> For the complete documentation index, see [llms.txt](https://docs.empe.io/llms.txt). Markdown versions of documentation pages are available by appending `.md` to page URLs; this page is available as [Markdown](https://docs.empe.io/develop/intro/issuing-credentials.md).

# Issuing Credentials

This guide explains how to issue a verifiable credential from the operator panel: pick an assigned schema, fill in the claim values, create a **credential offer**, and hand it to a holder as a QR code or deep link—or claim it directly into one of your cloud wallets.

Every credential offer is an **OpenID4VCI** pre-authorized offer. The offer is delivered as an `openid-credential-offer://...` URI (rendered as a QR code), which a compatible wallet scans to collect the credential.

***

## Open the Issue form

1. From the **Sidebar Menu**, open **Issuers** and select the Issuer you want to issue from.
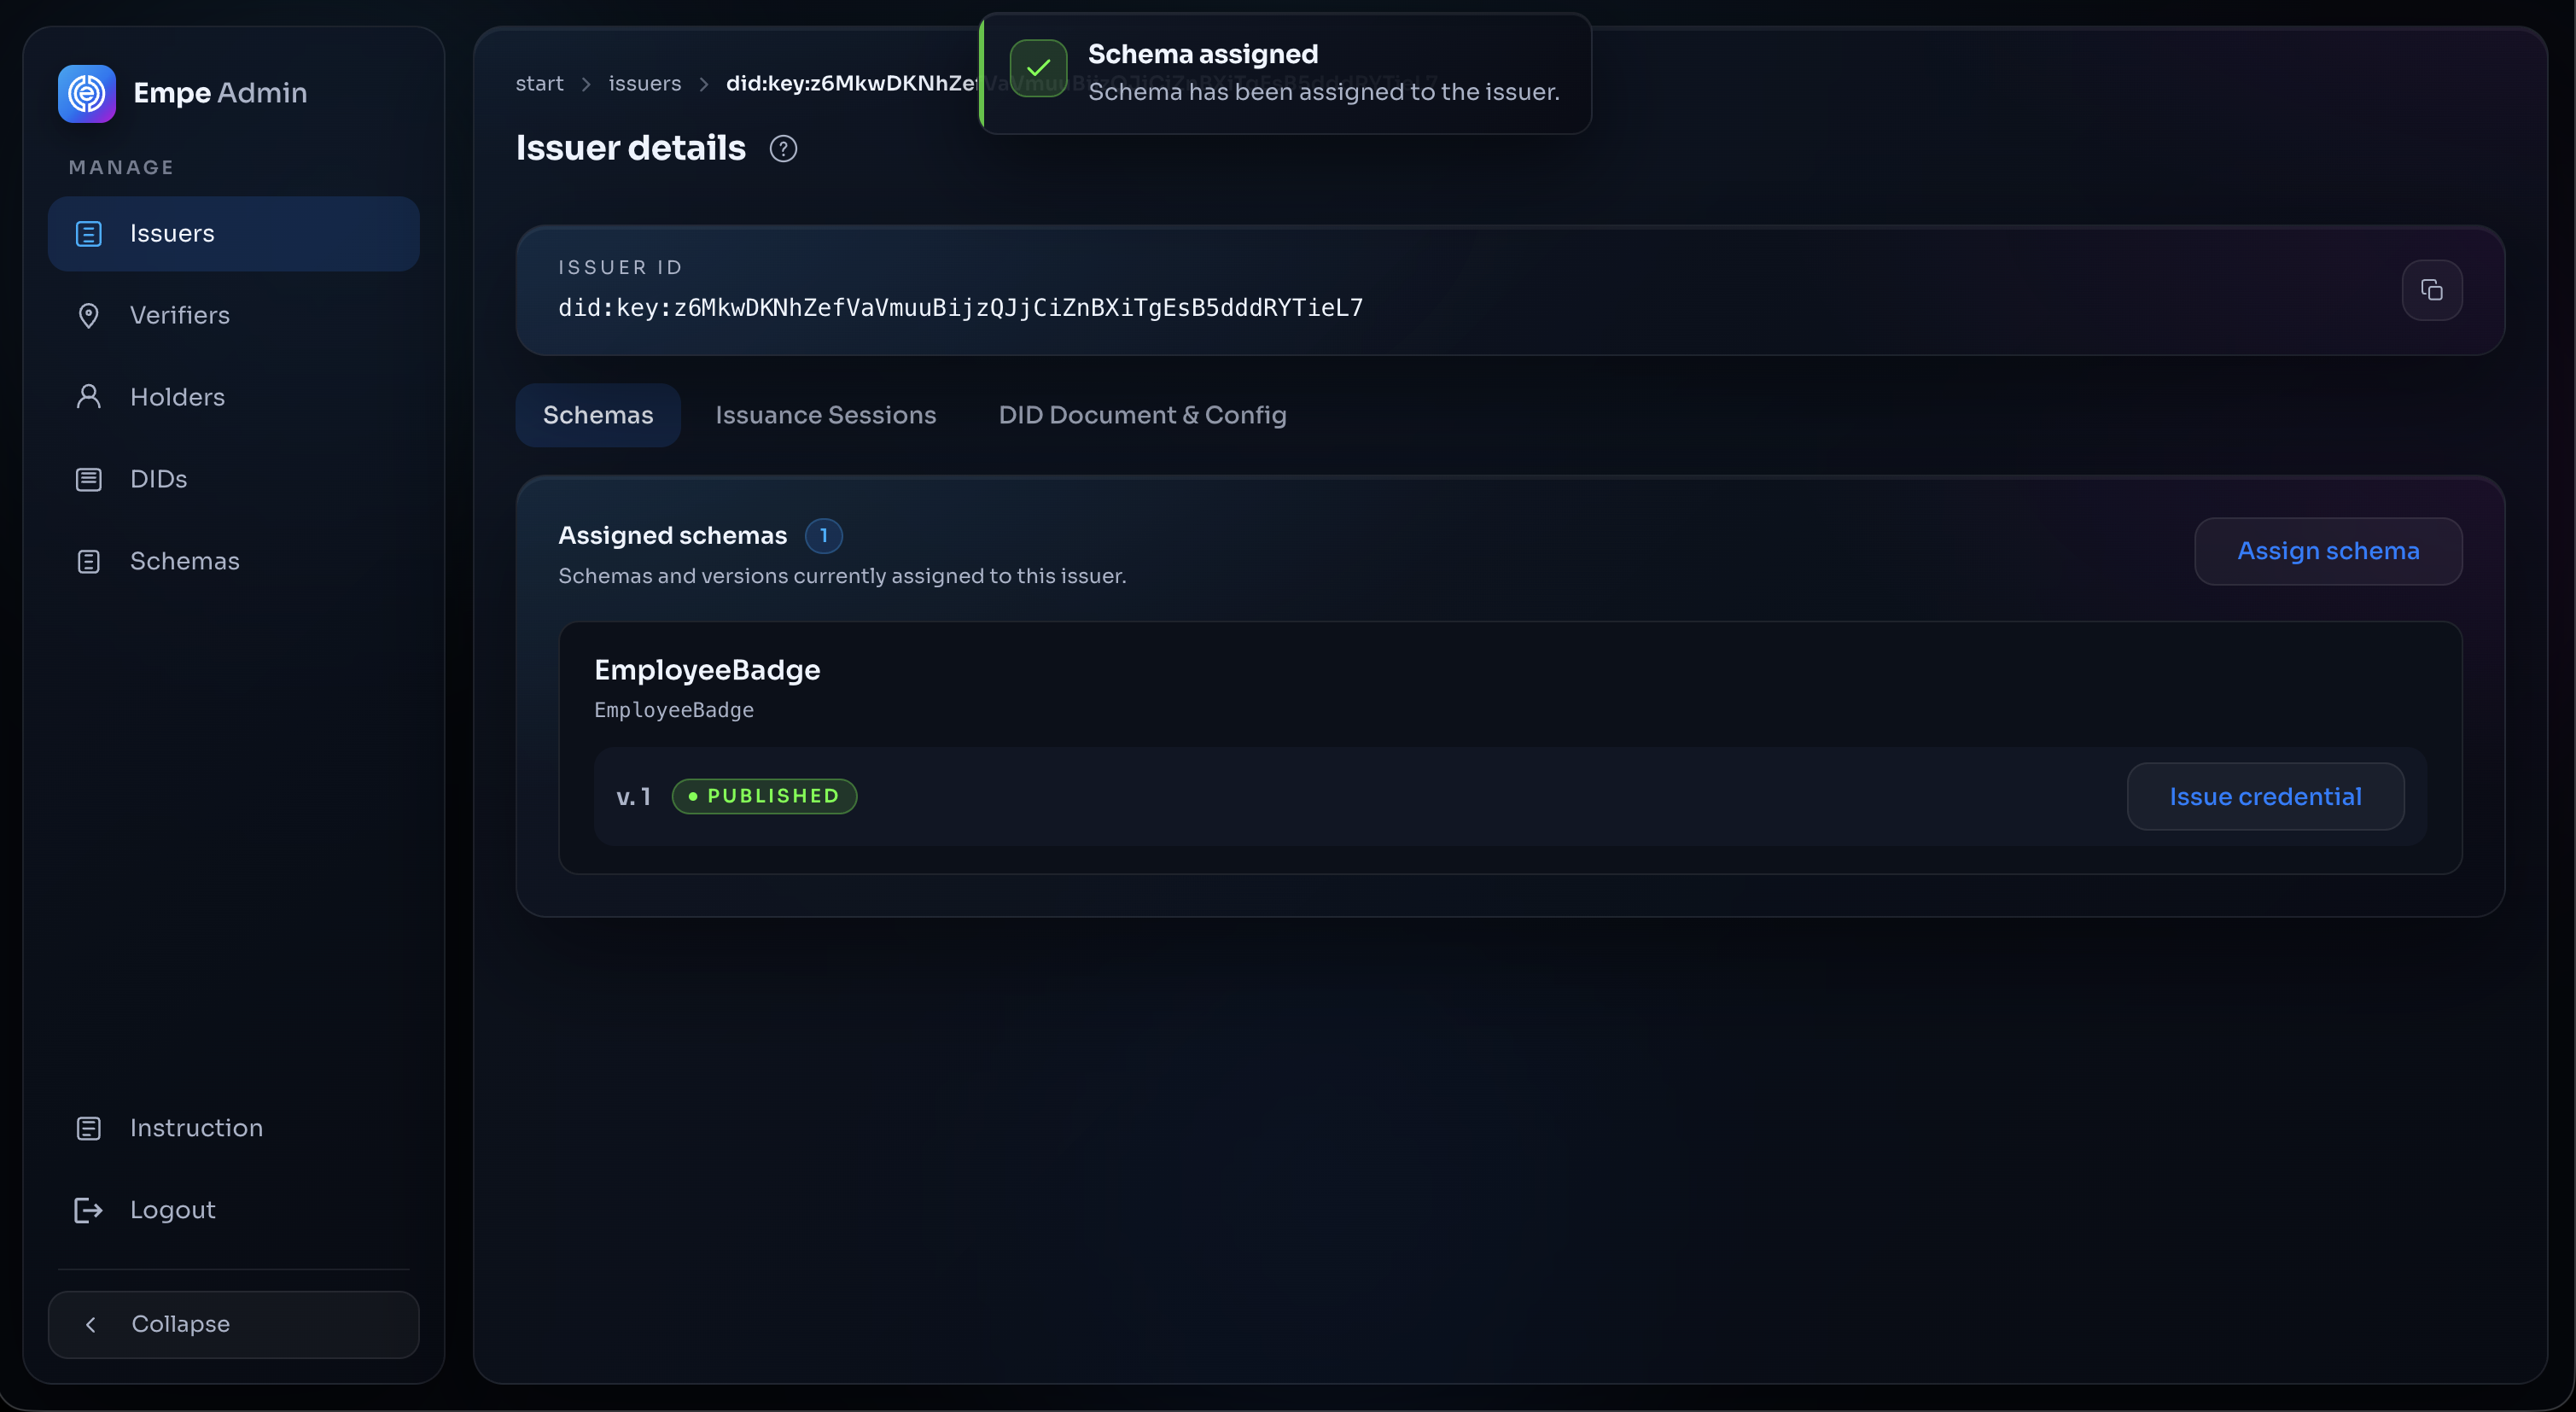
2. On the Issuer detail page, open the **Schemas** tab. The **Assigned schemas** section lists every schema bound to this Issuer, grouped by name and credential type, with one row per version.
3. Find the schema version you want and click **Issue credential**. *Note: the button is enabled only for **Published** schema versions; draft versions cannot be issued.*

<figure><img src="/files/UCTze8QTHlM2hdU3vtO8" alt="Issuer detail Schemas tab with Issue credential button"><figcaption><p>Issuer detail — the Schemas tab with an assigned schema and the Issue credential button</p></figcaption></figure>

***

## Fill in the claim fields

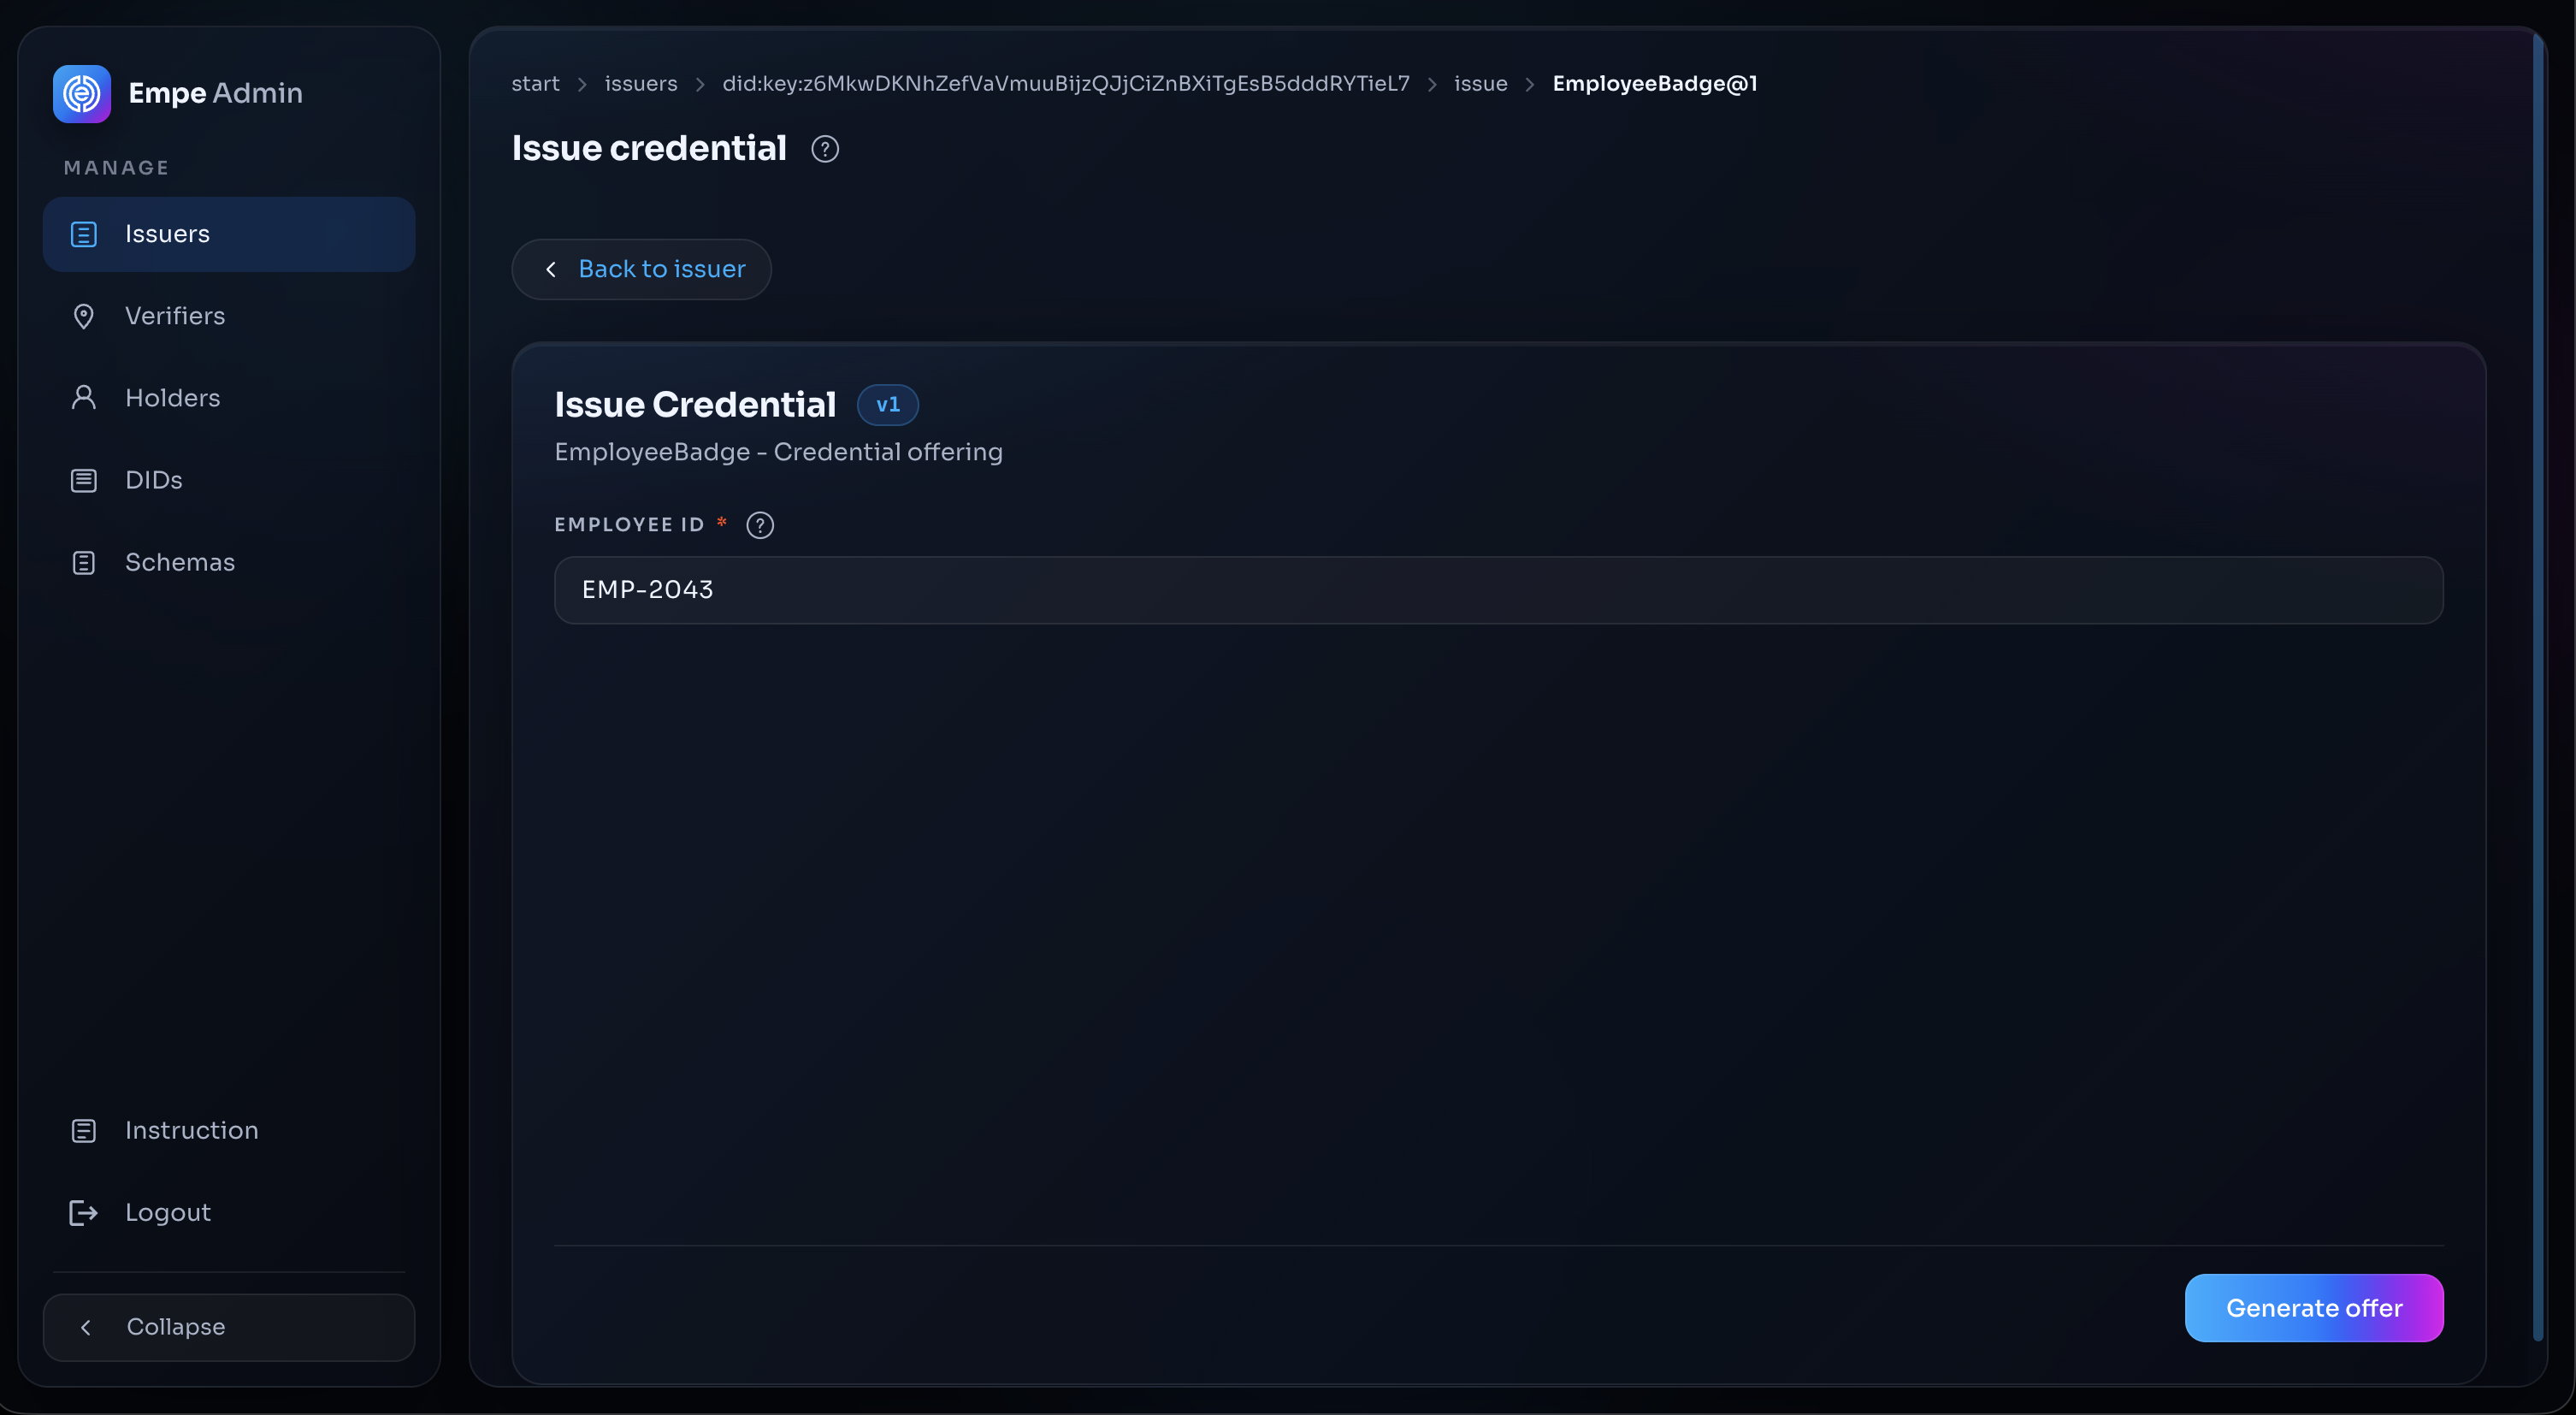
The **Issue Credential** form is generated automatically from the schema's claim definitions. Each property becomes an input, required fields are marked, and field titles and descriptions come from the schema.

1. Enter a value for every required claim (for example **employee\_id**, **full\_name**, **department**). Optional claims left blank are omitted from the credential.
2. Click **Generate offer** to create the offer.

<figure><img src="/files/6zApUV46zK7sjv40nu6Y" alt="Issue Credential form with claim inputs"><figcaption><p>The Issue Credential form with claim inputs filled in</p></figcaption></figure>

***

## Share the credential offer

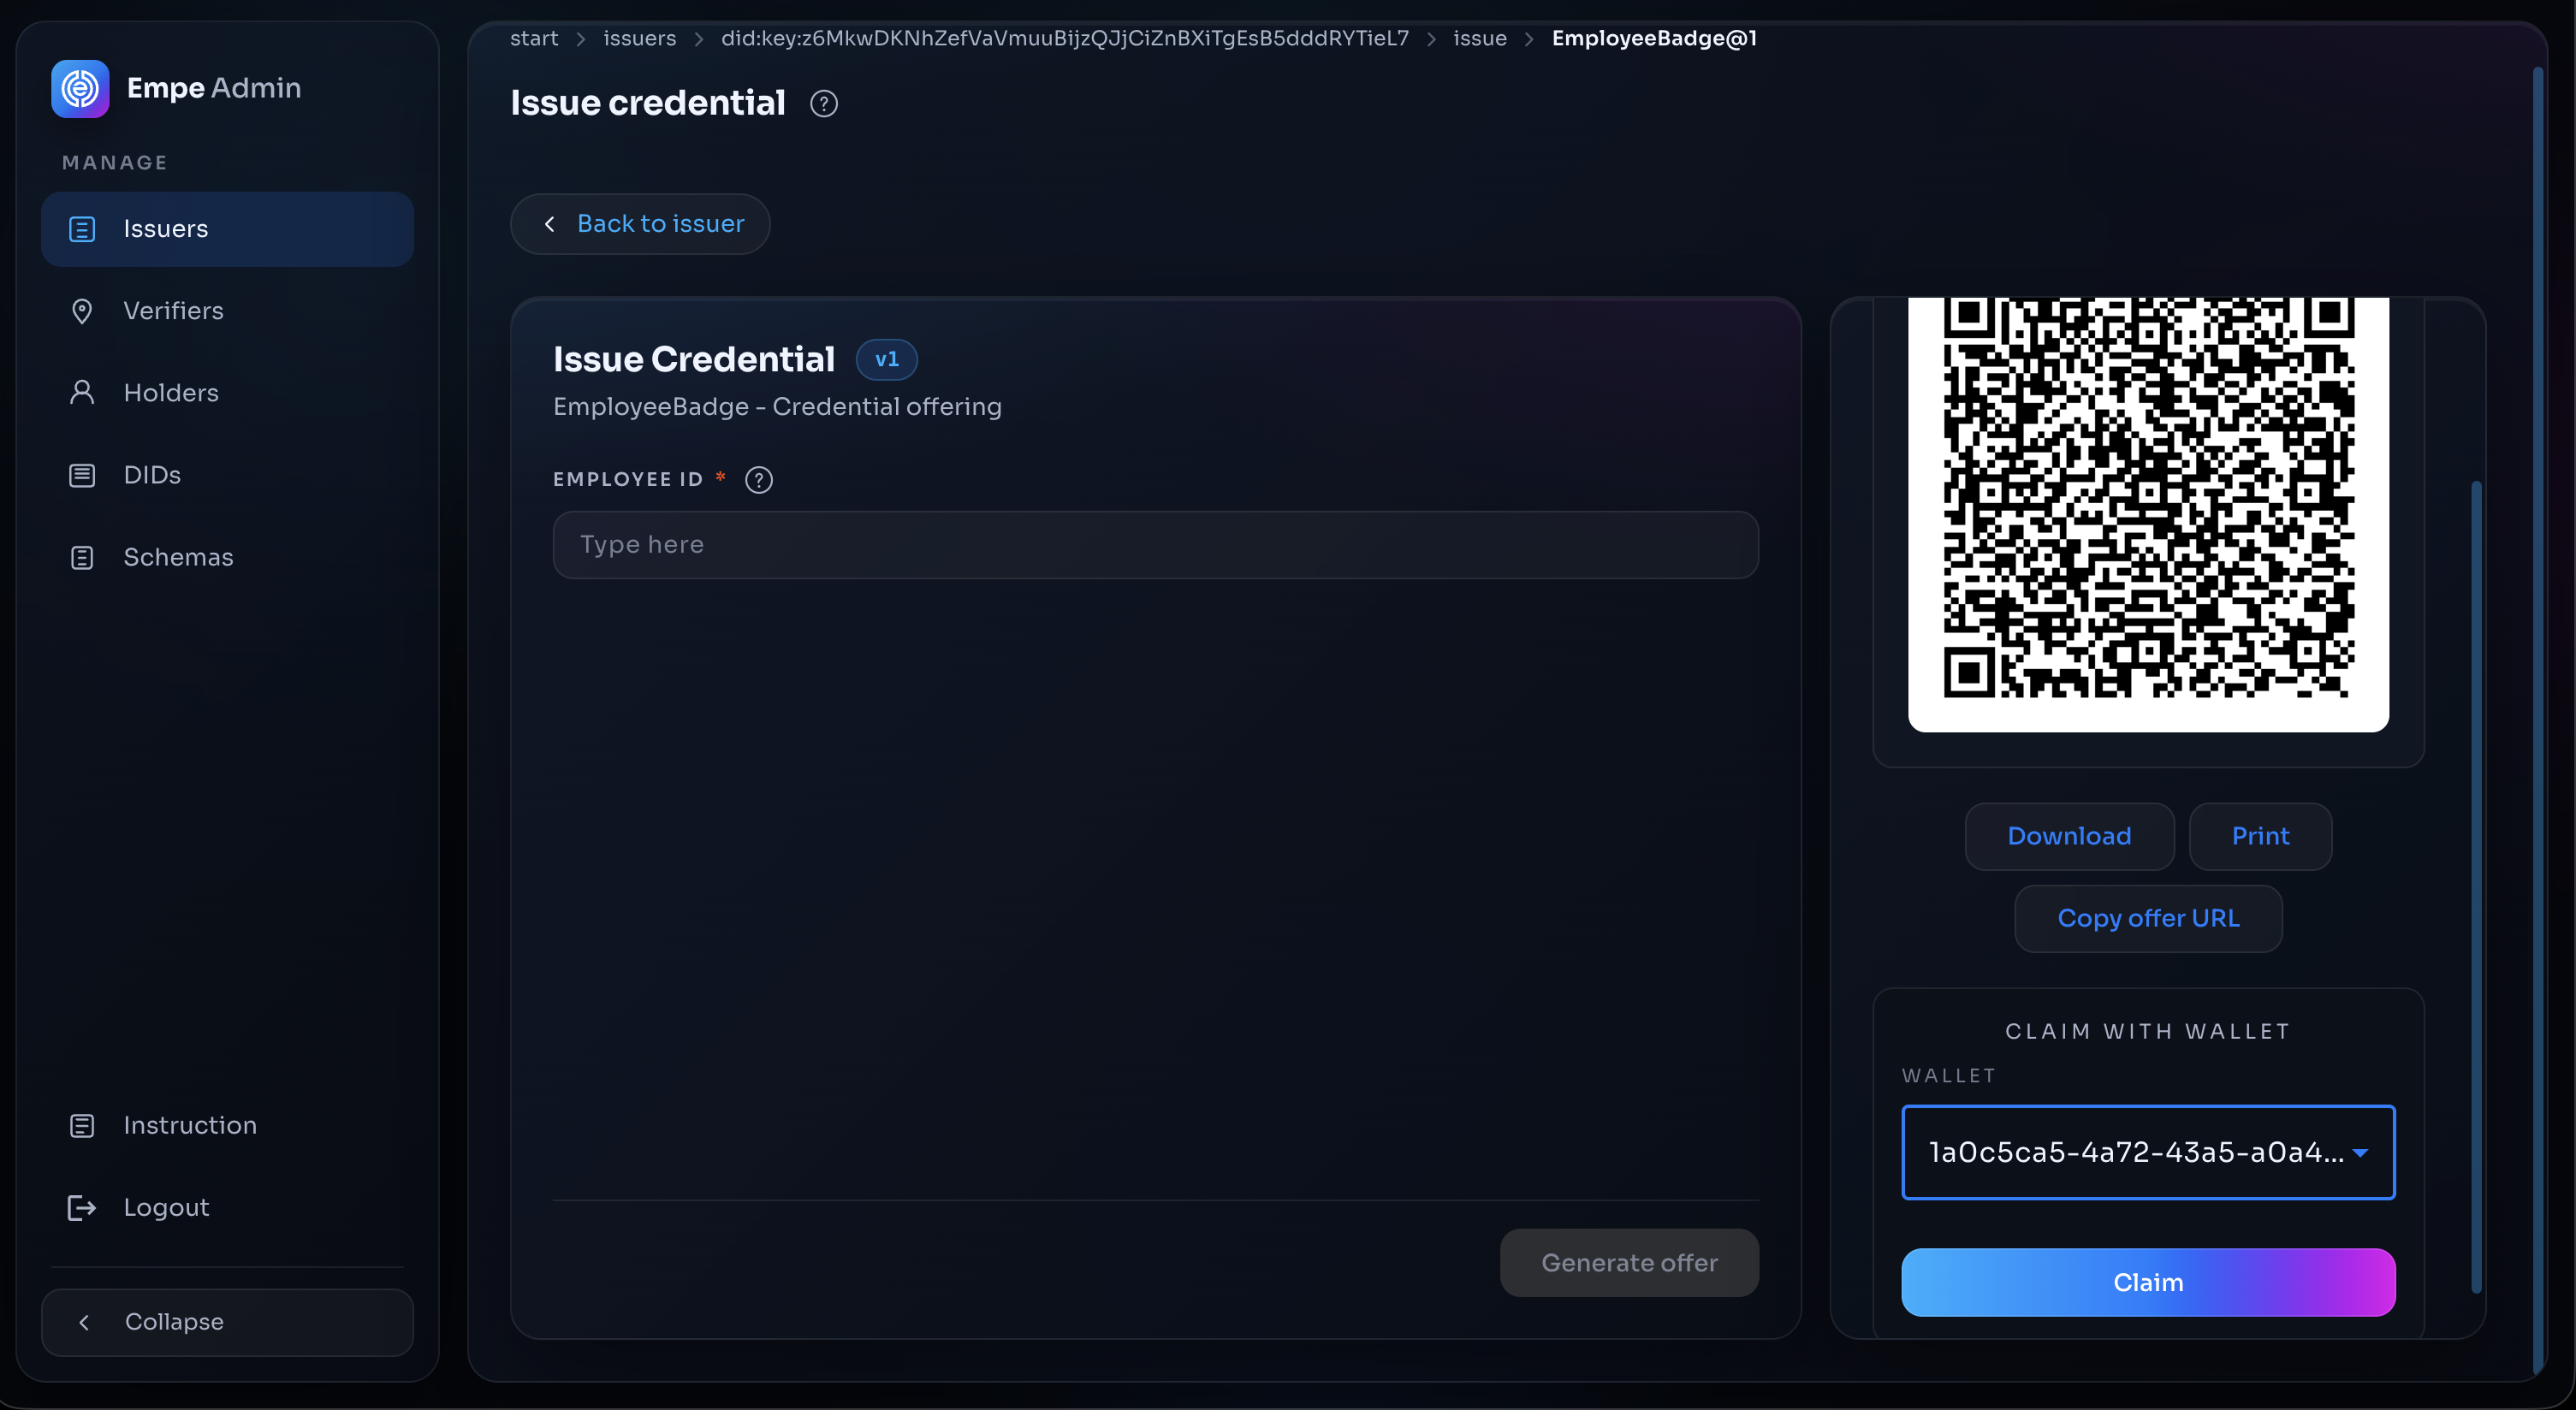
After the offer is created, a **QR Code** panel appears next to the form with the offer rendered as a scannable image. From this panel you can:

* **Scan** the QR code with a wallet to collect the credential.
* **Download** the QR code as a PNG.
* **Print** the QR code.
* **Copy offer URL** to copy the raw `openid-credential-offer://...` URI for sharing through another channel.

<figure><img src="/files/6kaMLsgxIHlHUmsazTgv" alt="QR Code panel with Download, Print, Copy offer URL"><figcaption><p>The QR Code panel with Download, Print, and Copy offer URL</p></figcaption></figure>

### What gets sent

Issuing from the form creates the offer via the credential-offers endpoint of the selected Issuer.

**Endpoint**

`POST /issuers/{issuerDid}/credential-offers/qr-code`

**Request Body**

```json
{
  "credentialConfigurationIds": ["EmployeeBadge@1:sd-jwt"],
  "issuanceMetadata": {
    "claimsByConfigurationId": {
      "EmployeeBadge@1:sd-jwt": {
        "employee_id": "E-1024",
        "full_name": "Ada Lovelace",
        "department": "Engineering"
      }
    }
  }
}
```

* **credentialConfigurationIds:** the credential configuration to issue, in the form `Name@Version:format` (e.g. `EmployeeBadge@1:sd-jwt`). The panel resolves this from the schema version you selected.
* **issuanceMetadata.claimsByConfigurationId:** the claim values you entered, keyed by the same configuration id.

The `qr-code` endpoint returns a **PNG** image of the QR code, with the offer URI in the `X-Credential-Offer-Uri` response header (and `X-Pin` when a PIN is required). The plain-JSON variant, `POST /issuers/{issuerDid}/credential-offers`, returns the offer details directly:

**Response Body**

```json
{
  "credentialOfferUri": "openid-credential-offer://?credential_offer=...",
  "issuanceSessionId": "a1b2c3d4-...",
  "credentialConfigurationIds": ["EmployeeBadge@1:sd-jwt"],
  "userPin": "1234"
}
```

* **credentialOfferUri:** the `openid-credential-offer://...` URI behind the QR code.
* **issuanceSessionId:** the id of the issuance session created for this offer; track its progress under the Issuer's **Issuance Sessions** tab.
* **userPin:** present only when the offer requires a PIN (see below).

***

## Track issuance sessions

Every offer creates an issuance session, listed under the Issuer's **Issuance Sessions** tab as a table of Session ID, State, and Created/Expires timestamps. Opening a session's **Session Dashboard** side panel re-displays the offer QR code for an active session, offers **Copy offer URL**, lists the issued credentials of a completed session, and lets you claim the offer straight into a cloud wallet.

***

## SD-JWT VC and JWT-VC-JSON

A schema can be published in two credential formats, and each format produces its own credential configuration id:

* **SD-JWT VC** — configuration id ends in `:sd-jwt` (e.g. `EmployeeBadge@1:sd-jwt`). SD-JWT credentials support **selective disclosure**, so the holder can later reveal individual claims to a verifier instead of the whole credential. The claims a schema marks as selectively disclosable are defined when the schema is created.
* **JWT-VC-JSON** — configuration id ends in `:jwt-vc-json` (e.g. `EmployeeBadge@1:jwt-vc-json`). The credential is a single signed JWT with all claims always present.

Pick the configuration that matches how the credential will be used: choose **SD-JWT VC** when holders need to share claims minimally, or **JWT-VC-JSON** for a simpler all-or-nothing credential.

The Issue Credential form resolves the credential configuration id automatically from the schema version you selected and issues that configuration; for a schema published in both formats, the panel picks one configuration for you. To issue a specific format, call `POST /issuers/{issuerDid}/credential-offers` with the exact `credentialConfigurationIds` you want (for example `EmployeeBadge@1:jwt-vc-json`).

***

## PIN-protected offers

A credential offer can require the holder to enter a short transaction PIN before the credential is released. This binds collection to someone who has both the QR code and the PIN, which you can deliver over a separate channel.

When an offer requires a PIN, the offer is created with `requirePin: true`, the response includes a `userPin` value, and the QR-code response carries the PIN in the `X-Pin` header. Share that PIN with the holder out of band.

PIN-protected offers are created through the API: send `requirePin: true` in the body of `POST /issuers/{issuerDid}/credential-offers` (or its `/qr-code` variant). The Issue Credential form always creates offers without a PIN.

***

## Claim into a cloud wallet

Instead of handing the QR code to an external wallet, you can claim the offer directly into one of your own **cloud wallet** holders—useful for testing an end-to-end flow.

1. In the **QR Code** panel, find the **Claim with wallet** section.
2. Select a holder from the **Wallet** dropdown (the list shows the holders you have created).
3. Click **Claim**.

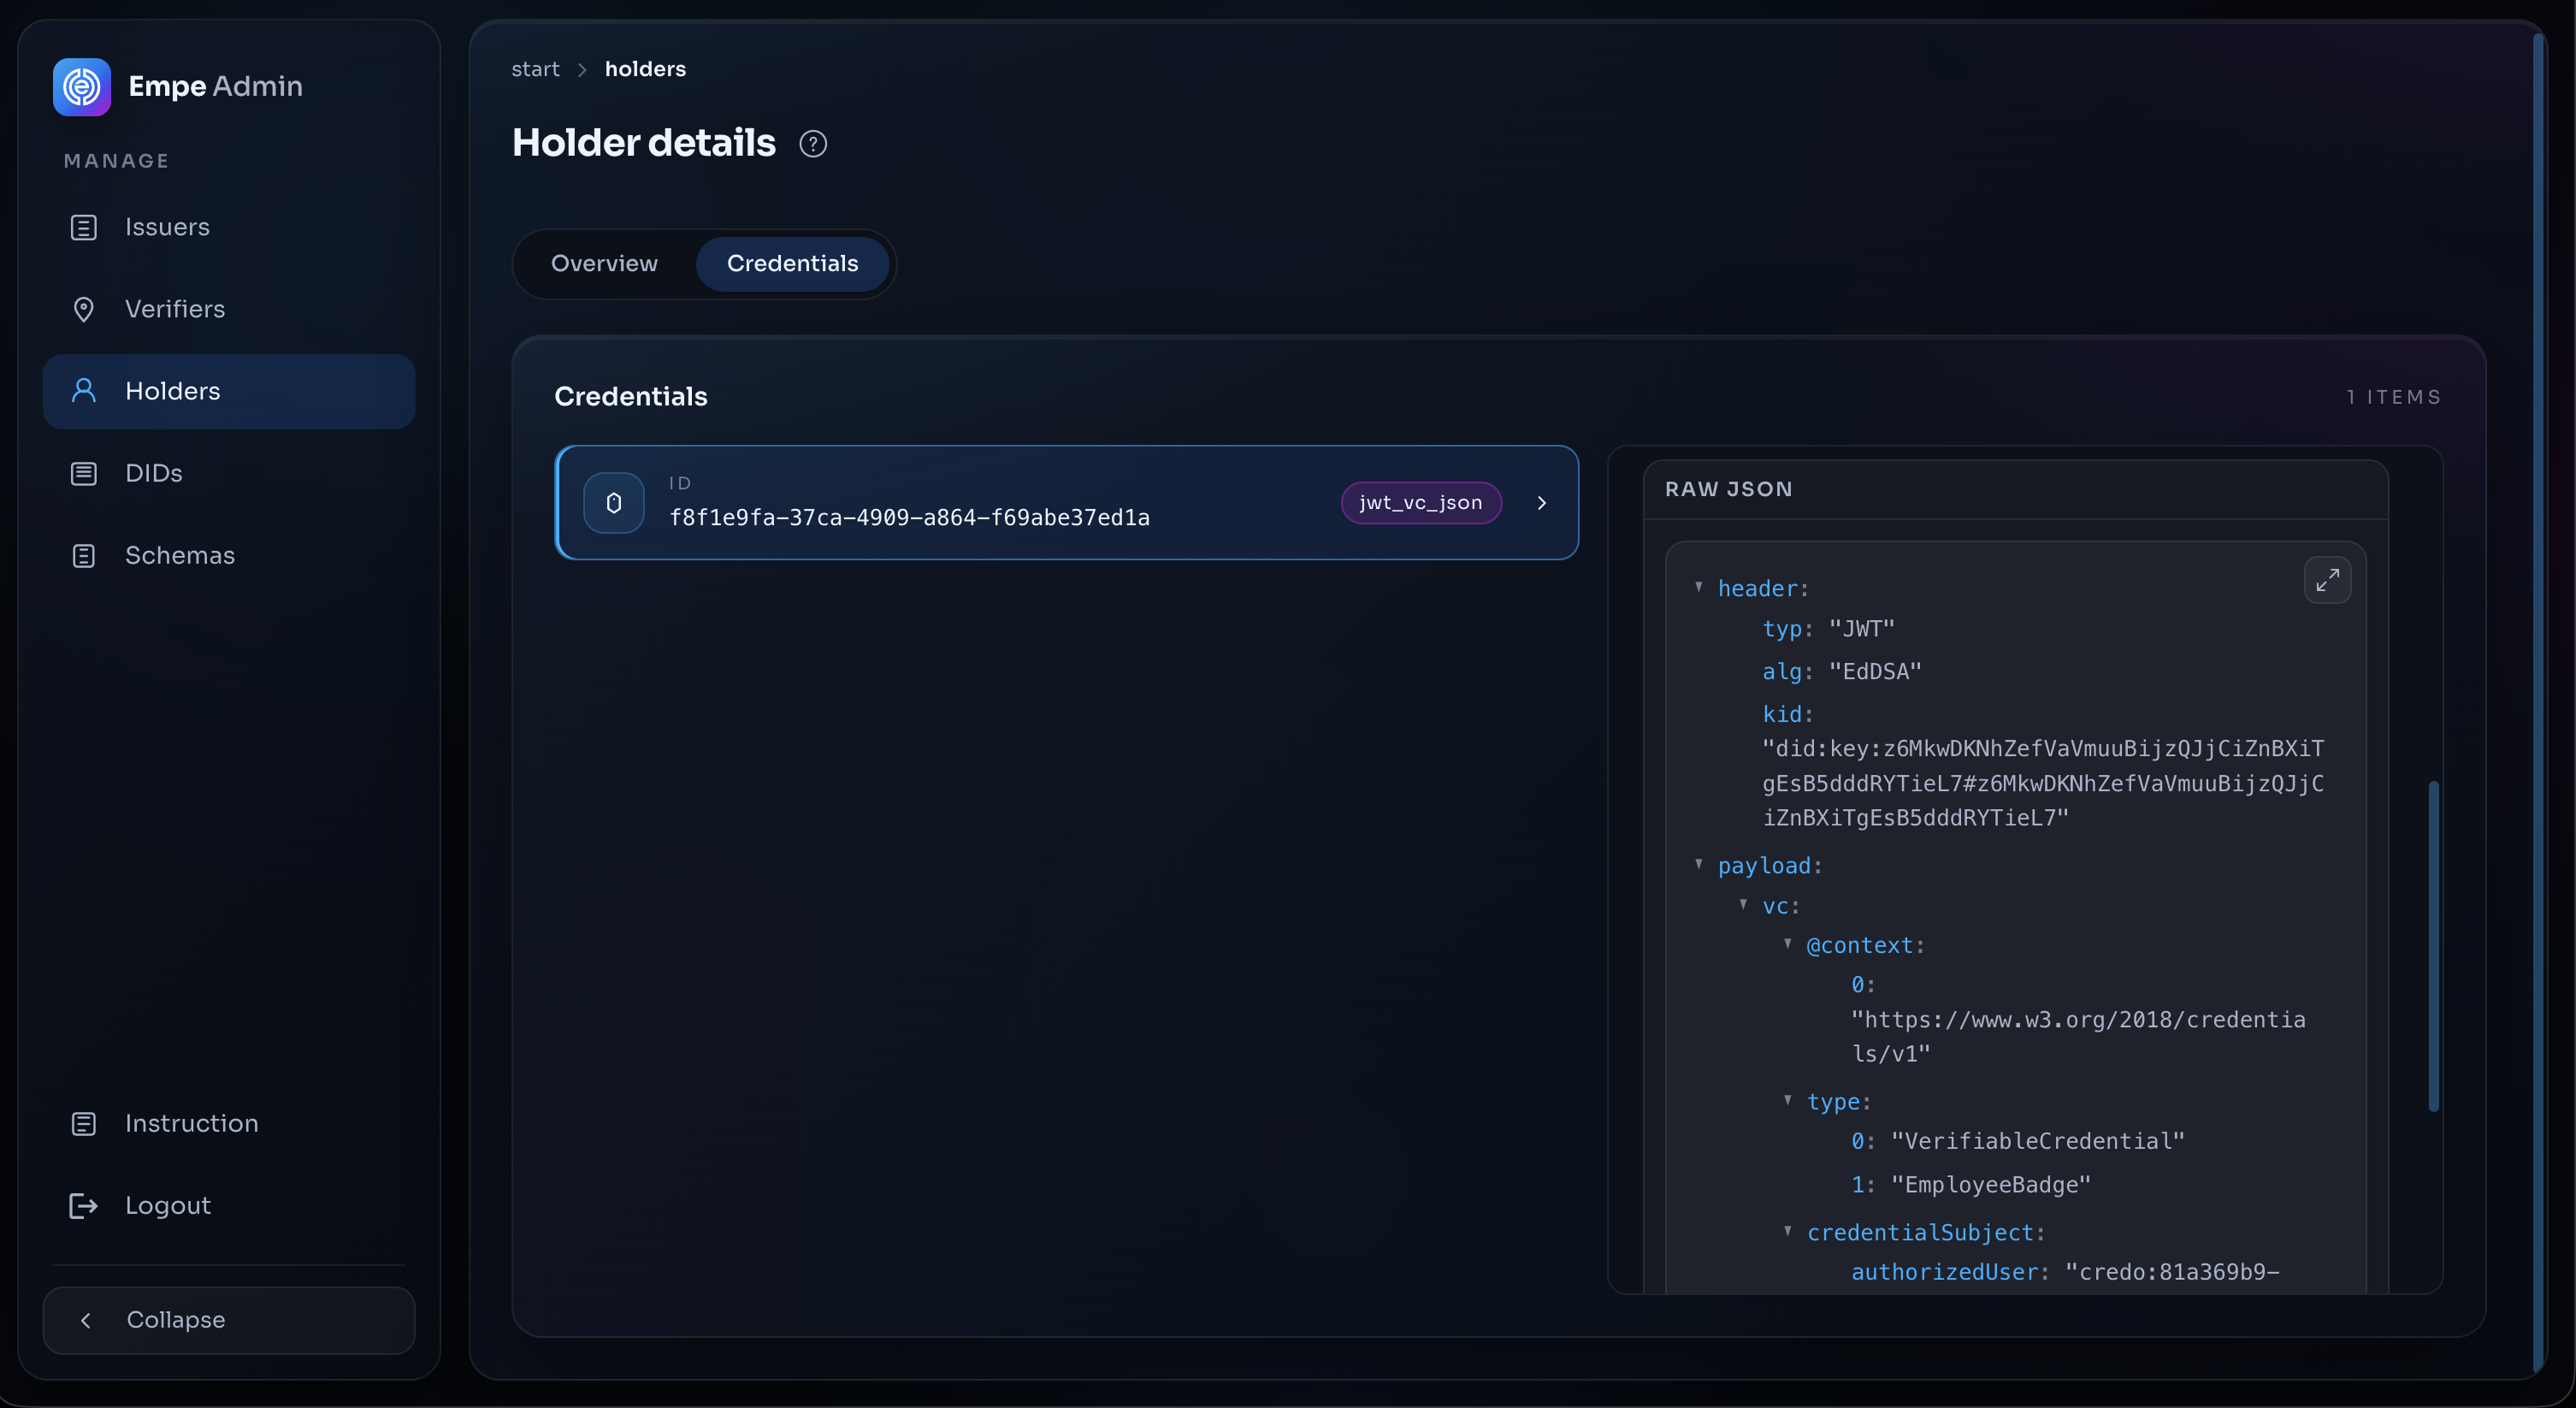
The panel sends the offer URI to the selected holder, which collects the credential into its wallet. On success you are taken to that holder's **Credentials** view, where the new credential appears.

<figure><img src="/files/6kaMLsgxIHlHUmsazTgv" alt="Claim with wallet section"><figcaption><p>The Claim with wallet section with the holder dropdown and Claim button</p></figcaption></figure>

<figure><img src="/files/URsVYG6S0BEzXmODRWUO" alt="Holder details Credentials tab with the claimed credential"><figcaption><p>The holder's <strong>Credentials</strong> view after a successful claim, with the credential's raw JSON</p></figcaption></figure>

**Endpoint**

`POST /holders/{holderId}/process`

**Request Body**

```json
{
  "uri": "openid-credential-offer://?credential_offer=..."
}
```

**Response Body**

```json
{
  "status": "success",
  "claimed": 1,
  "ids": ["..."]
}
```

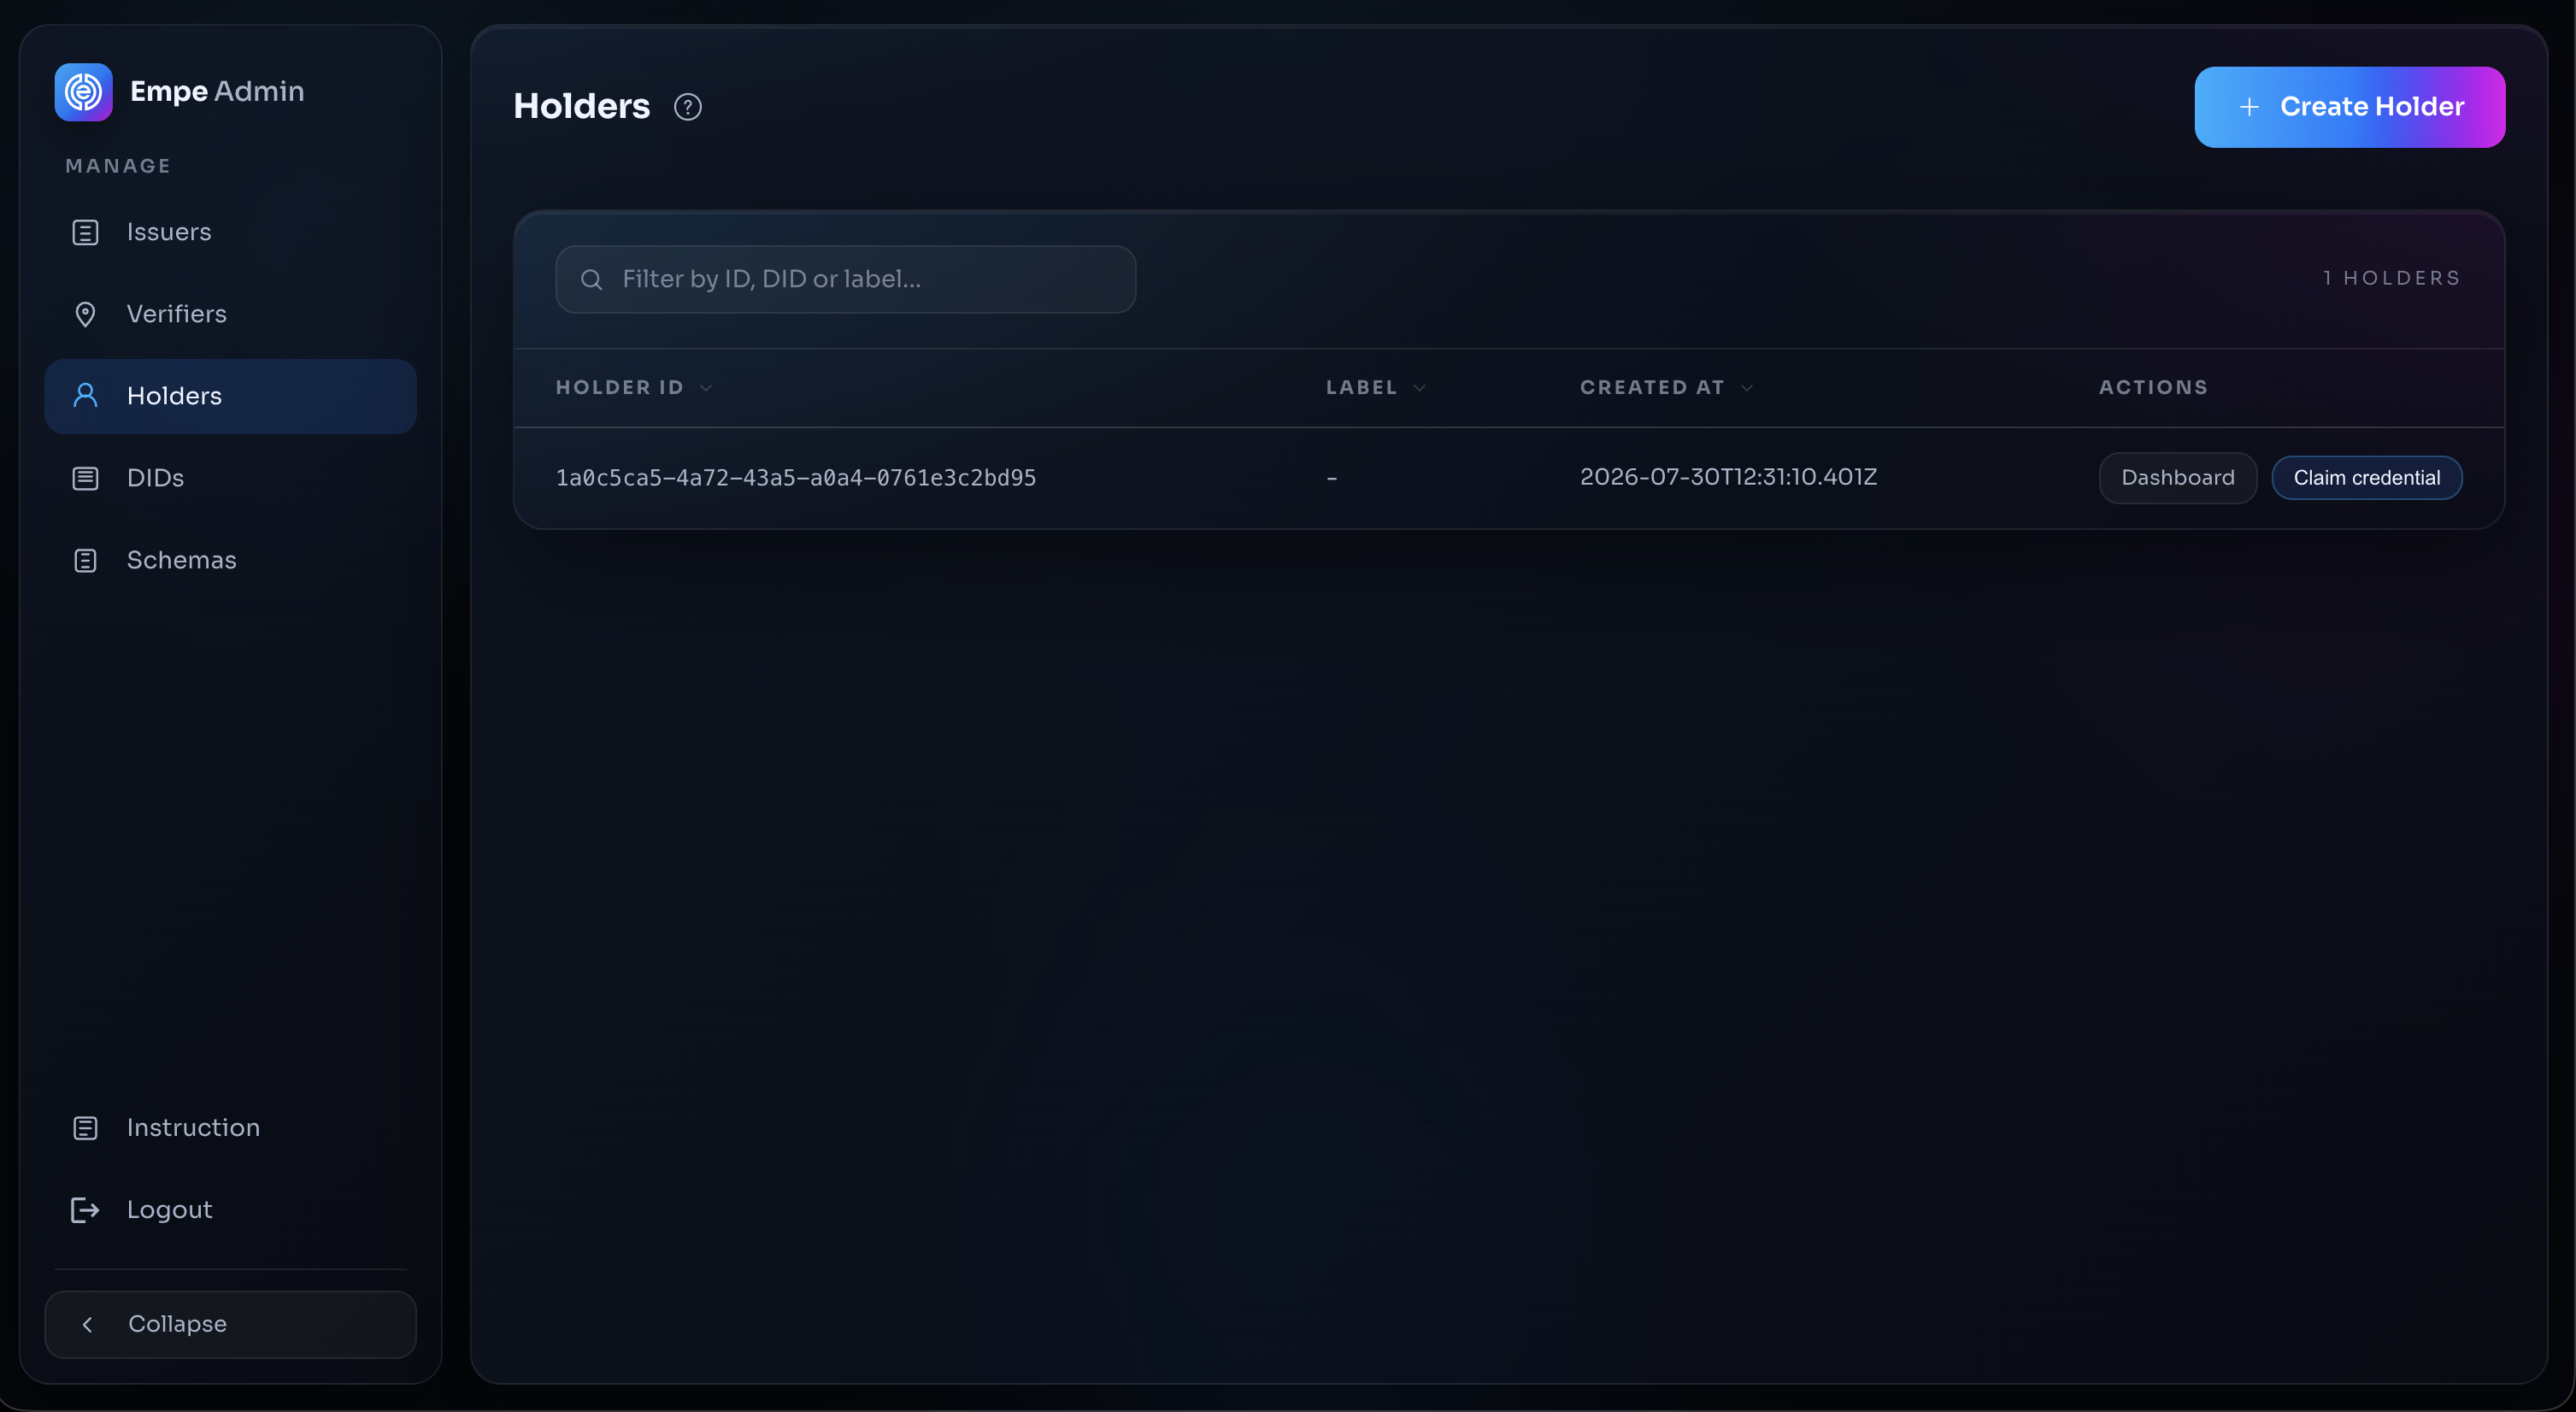
If you need to claim into a holder that does not yet exist, create one first from the **Holders** section, then return to the offer and select it in the **Wallet** dropdown.

<figure><img src="/files/B8cQKN1obWq7PWA5Y40s" alt="Holders list with Dashboard and Claim credential actions"><figcaption><p>The <strong>Holders</strong> screen — each holder offers a <strong>Dashboard</strong> and a <strong>Claim credential</strong> action</p></figcaption></figure>


---

# Agent Instructions
This documentation is published with GitBook. GitBook is the documentation platform designed so that both humans and AI agents can read, navigate, and reason over technical content effectively. Learn more at gitbook.com.

## Querying This Documentation
If you need additional information that is not directly available in this page, you can query the documentation dynamically by asking a question.

Perform an HTTP GET request on the current page URL with the `ask` query parameter, and the optional `goal` query parameter:

```
GET https://docs.empe.io/develop/intro/issuing-credentials.md?ask=<question>&goal=<endgoal>
```

`ask` is the immediate question: it should be specific, self-contained, and written in natural language.
`goal` is optional and describes the broader end goal you are ultimately trying to accomplish on behalf of the user. GitBook uses it to tailor the answer towards what is most useful for that goal.

The response will contain a direct answer to the question and relevant excerpts and sources from the documentation.

Use this mechanism when the answer is not explicitly present in the current page, you need clarification or additional context, or you want to retrieve related documentation sections.